 Evgenii Zhuravlev - DevOps Engineer
Flexible CI/CD pipelines in GitLab. Version control and deployment in different environments using tags.
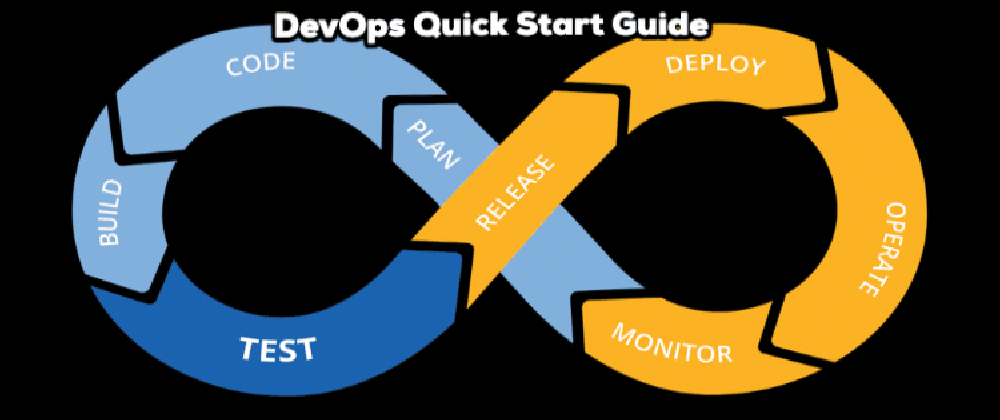
The perfect pipeline is unattainable, that’s true. The fact is that you can use many steps for your pipeline, adding them as needed, it can include:
- Code security scanning
- Code Review / Approved
- Linters
- Code Coverage
- Unit tests
- Builds
- Scan packages
- Deploy
- Integration testing
- Performance testing (load/stress testing)
Two main questions arise here.
1) What steps should be included in my pipeline? There is no universal answer to this question because these steps are created individually based on the needs of your workflow. 2) How do I manage my pipeline so that it can deploy different versions of applications to different environments? To answer this question, we can use the Gitlab Tags approach, which will be clear to you after reading this note.
Let’s look at the simplest initial modular pipeline using Gitlab as an example to understand the principle, which you can further develop by adding the steps you need. We’ll add three steps that developers can connect to CI/CD pipelines. These will be linter + build + deploy. The strength of this approach is that they will be able to replace existing pieces of code in their pipelines with these includes, getting a unified solution.
Let’s assume that development currently has a repository gitlab.example.com/develop, which has created such a file .gitlab-ci.yml:
variables:
    ...

stages:
  - build-dev
  - build-prod
  - deploy

build-dev-job:
  interruptible: true
  stage: build-dev
  allow_failure: false
  image: docker:stable
  script:
    - docker login ...
    - docker build ${tag-dev} ...
    - docker push ${tag-dev} ...
  only:
    refs:
      - dev

build-prod-job:
  stage: build-prod
  allow_failure: false
  image: docker:stable
  script:
    - docker login ...
    - docker build ${tag-prod} ...
    - docker push ${tag-prod} ...
  only:
    refs:
      - prod

deploy-job:
  stage: deploy
  script:
    - helm upgrade -i ...
      -f ./values.yaml
      --set tag=${tag-prod} ...
      --create-namespace
  only:
    refs:
      - prod
  when: manual
And in each project of each development team, it can be duplicated or slightly different, as in gitlab.example.com/develop/.gitlab-ci.yml, and in gitlab.example.com/develop1/.gitlab-ci.yml and so on. Our goal will be to create modular steps for them that they can connect to their pipelines without maintaining each of their .gitlab-ci.yml separately.
And also give them the ability to manage releases using Gitlab Tags, and deploy the same version of application code to different environments for testing, staging, and production to eliminate code drift.
Step One. Create the structure
We will create a project gitlab.example.com/shared, in which we will create repositories:
gitlab.example.com/shared/linters gitlab.example.com/shared/build gitlab.example.com/shared/deploy
This structure will allow us to manage shared code and connect it to developer repositories in a modular way.
Don’t forget to add the gitlab.example.com/develop group with the Developer role in the gitlab.example.com/shared project in Group members (Manage -> Members -> Group members), otherwise when including shared code in the develop pipeline, it will fail with an access error on behalf of the person who launched it!
Step Two. Create linters
In the previously created project gitlab.example.com/shared, let’s create linters with directories:
gitlab.example.com/shared/linters/ansible gitlab.example.com/shared/linters/docker gitlab.example.com/shared/linters/terraform gitlab.example.com/shared/linters/…
(This depends on what specifically needs to be linted in your case.)
The code in the files might look like this:
cat gitlab.example.com/shared/linters/ansible/.gitlab-ci.yml
variables:
  ALPINE_VERSION: 3.20.3
  ANSIBLE_LINT_VERSION_ALPINE_PACK: 24.5.0-r0

stages:
  - ansible_lint

ansible-lint-job:
  stage: ansible_lint
  image: alpine:${ALPINE_VERSION}
  script:
    - echo "Installing Ansible Lint..."
    - apk update
    - apk upgrade
    - apk add ansible-lint=${ANSIBLE_LINT_VERSION_ALPINE_PACK}
    - echo "Running Ansible Lint..."
    - |
      FILES=$(find . -type f \( -name '*.yml' -o -name '*.yaml' \) -exec grep -El '(hosts:|tasks:|roles:)' {} +)
      if [ -n "$FILES" ]; then
        for file in $FILES; do
          echo "Linting $file..."
          ansible-lint "$file" | tee ansible_lint.log
        done
      else
        echo "No Ansible YAML files found, skipping linting."
        exit 1
      fi
  rules:
    - when: always
  artifacts:
    when: always
    paths:
      - ansible_lint.log
    expire_in: 1 week
cat gitlab.example.com/shared/linters/docker/.gitlab-ci.yml
variables:
  ALPINE_VERSION: 3.20.3
  HADOLINT_VERSION: v2.12.0

stages:
  - docker_lint

docker-lint-job:
  stage: docker_lint
  image: alpine:${ALPINE_VERSION}
  rules:
    - if: '$CI_COMMIT_TAG && $CI_COMMIT_REF_PROTECTED == "true"'
      when: always
    - when: never
  script:
    - echo "Installing Hadolint..."
    - apk add --no-cache curl
    - curl -sSL https://github.com/hadolint/hadolint/releases/download/${HADOLINT_VERSION}/hadolint-Linux-x86_64 -o /usr/local/bin/hadolint
    - chmod +x /usr/local/bin/hadolint
    - echo "Running Hadolint..."
    - |
      FILES=$(find . -type f -name '*Dockerfile*')
      if [ -n "$FILES" ]; then
        for file in $FILES; do
          echo "Linting $file..."
          hadolint --no-fail "$file" | tee docker_lint.log
        done
      else
        echo "No files containing 'Dockerfile' found, skipping linting."
        exit 1
      fi
  artifacts:
    when: always
    paths:
      - docker_lint.log
    expire_in: 1 week
cat gitlab.example.com/shared/linters/terraform/.gitlab-ci.yml
variables:
  ALPINE_VERSION: 3.20.3
  TFLINT_VERSION: v0.48.0

stages:
  - terraform_lint

terraform-lint-job:
  stage: terraform_lint
  image: alpine:${ALPINE_VERSION}
  script:
    - echo "Installing Terraform Linter..."
    - apk update
    - apk upgrade
    - apk add --no-cache curl
    - curl -L https://github.com/terraform-linters/tflint/releases/download/${TFLINT_VERSION}/tflint_linux_amd64.zip -o tflint.zip
    - apk add --no-cache unzip
    - unzip tflint.zip -d /usr/local/bin
    - chmod +x /usr/local/bin/tflint
    - rm tflint.zip
    - echo "Running Terraform Linter recursively..."
    - tflint --recursive | tee tflint.log || exit 1
  artifacts:
    when: always
    paths:
      - tflint.log
    expire_in: 1 week
  rules:
    - when: always
Step Three. Create builders
In the previously created project gitlab.example.com/shared, let’s create builders with directories:
gitlab.example.com/shared/build/service gitlab.example.com/shared/build/service-feature gitlab.example.com/shared/build/service-feature1 gitlab.example.com/shared/build/…
(This depends on what specifically needs to be built in your case.) What’s important to understand here?
The build can be universal for all services if they are built absolutely identically, then you will only need one file gitlab.example.com/shared/build/service/.gitlab-ci.yml, which you can connect to all services at once. But if there are differences in builds between services and they require different workflows, then you may need to support additional files in which you can take into account the specifics of building for certain services: gitlab.example.com/shared/build/service-feature/.gitlab-ci.yml, gitlab.example.com/shared/build/service-feature1/.gitlab-ci.yml and so on.
The code in the files might look like this:
cat gitlab.example.com/shared/build/service/.gitlab-ci.yml
stages:
  - build

build-dev-job:
  stage: build
  allow_failure: false
  when: manual
  except:
    - tags
    - protected
  image:
    ...
  script: |
    docker build -f $CI_PROJECT_DIR/Dockerfile \
      --tag ${CI_REGISTRY_IMAGE}:${CI_COMMIT_REF_NAME////_}-${CI_COMMIT_SHORT_SHA}
    docker push ${CI_REGISTRY_IMAGE}:${CI_COMMIT_REF_NAME////_}-${CI_COMMIT_SHORT_SHA}
    if [ $? -eq 0 ]; then
      echo "The image was successfully build: ${CI_REGISTRY_IMAGE}:${CI_COMMIT_REF_NAME////_}-${CI_COMMIT_SHORT_SHA}"
    else
      echo "Build problem!"
      exit 1
    fi

build-prod-job:
  stage: build
  allow_failure: false
  rules:
    - if: '$CI_COMMIT_TAG && $CI_COMMIT_REF_PROTECTED == "true"'
      when: always
    - when: never
  image:
    ...
  script: |
    docker build -f $CI_PROJECT_DIR/Dockerfile \
      --tag ${CI_REGISTRY_IMAGE}:${CI_COMMIT_TAG}
    docker push ${CI_REGISTRY_IMAGE}:${CI_COMMIT_TAG}
    if [ $? -eq 0 ]; then
      echo "The image was successfully build: ${CI_REGISTRY_IMAGE}:${CI_COMMIT_TAG}"
    else
      echo "Build problem!"
      exit 1
    fi
It’s important to give some explanations here:
Instructions
    - tags
    - protected
in both jobs are configured in such a way that when using a Gitlab tag on a stable branch - you will get an automatic start of the prod build. In all other cases, you can start the build manually, for example for testing in a separate environment.
Step Four. Create deployments
In the previously created project gitlab.example.com/shared, let’s create deployments with directories:
gitlab.example.com/shared/deploy/service gitlab.example.com/shared/deploy/service-feature1 gitlab.example.com/shared/deploy/service-feature1 gitlab.example.com/shared/deploy/…
(This depends on what specifically needs to be deployed in your case.) What’s important to understand here?
As in the previous point, deployment can be universal for all services if they are deployed absolutely identically, then you will only need one file gitlab.example.com/shared/deploy/service/.gitlab-ci.yml, which you can connect to all services at once. But if there are differences in deployments between services and they require different workflows, then you may need to support additional files in which you can take into account the specifics of deployment for certain services: gitlab.example.com/shared/deploy/service-feature1/.gitlab-ci.yml, gitlab.example.com/shared/deploy/service-feature2/.gitlab-ci.yml and so on.
I want to add here that at this step in deployments, it is possible to divide them not only by the features of services, but also by environments, for example:
gitlab.example.com/shared/deploy/service-dev/.gitlab-ci.yml gitlab.example.com/shared/deploy/service-stage/.gitlab-ci.yml gitlab.example.com/shared/deploy/service-prod/.gitlab-ci.yml
The code in the files might look like this:
cat gitlab.example.com/shared/deploy/service-dev/.gitlab-ci.yml
stages:
  - deploy-dev

deploy-dev-job:
  stage: deploy-dev
  needs:
    - build-dev-job
  except:
    - tags
    - protected
  image:
    ...
  script: |
    docker login ...
    helm upgrade -i "${CI_PROJECT_NAME}-dev" \
      -n "${CI_PROJECT_NAME}-dev" \
      -f values-dev.yaml \
      --create-namespace \
      --set images.repository="${CI_REGISTRY_IMAGE}" \
      --set images.tag="${CI_COMMIT_REF_NAME////_}"-"${CI_COMMIT_SHORT_SHA}" \
      ... \
      --debug \
    if [ $? -eq 0 ]; then
      echo "The image was successfully deployed in the dev stand (K8s): ${CI_REGISTRY_IMAGE}:${CI_COMMIT_REF_NAME////_}-${CI_COMMIT_SHORT_SHA}"
    else
      echo "Deployment problem!"
      exit 1
    fi
cat gitlab.example.com/shared/deploy/service-prod/.gitlab-ci.yml
stages:
  - deploy-prod

deploy-prod-job:
  stage: deploy-prod
  allow_failure: false
  rules:
    - if: '$CI_COMMIT_TAG && $CI_COMMIT_REF_PROTECTED == "true"'
      when: manual
    - when: never
  needs:
    - build-prod-job
  image:
    ...
  script: |
    docker login ...
    helm upgrade -i "${CI_PROJECT_NAME}" \
      -n "${CI_PROJECT_NAME}" \
      -f values-prod.yaml \
      --create-namespace \
      --set images.repository="${CI_REGISTRY_IMAGE}" \
      --set images.tag="${IMAGE_TAG}" \
      ... \
      --debug \
    if [ $? -eq 0 ]; then
      echo "The image was successfully deployed in the production stand (K8s): ${CI_REGISTRY_IMAGE}:${IMAGE_TAG}"
    else
      echo "Deployment problem!"
      exit 1
    fi
This is the most interesting step in my note. Note that the needs: instructions expect the corresponding steps from the previous step where we configured the build listing. Because they should not be executed if the build fails. They also expect the creation of a Gitlab tag on a stable branch - to manually launch the prod deployment. In all other cases, the deployment will occur in the K8s Namespace with the -dev postfix for testing. Flow control can occur in one file (for this, combine the listings of the files gitlab.example.com/shared/deploy/service-dev/.gitlab-ci.yml and gitlab.example.com/shared/deploy/service-prod/.gitlab-ci.yml into one). Here I use two files to clearly demonstrate the principle.
It doesn’t matter where we deploy at this step. Perhaps you won’t be using K8s at all, but a Linux server or transferring a package to artifacts, the principle will remain unchanged, just replace the deployment target.
Step Five. Transfer all created steps to the pipeline
At the beginning, we said that gitlab.example.com/develop/.gitlab-ci.yml is managed locally, now we can add our includes created above to it, and get such a listing:
variables:
  IMAGE_TAG: ${CI_COMMIT_TAG}

include:
  - project: 'shared/linters'
    file: 'docker/.gitlab-ci.yml'
    ref: 'main'
  - project: 'shared/linters'
    file: 'ansible/.gitlab-ci.yml'
    ref: 'main'
  - project: 'shared/build'
    file: 'docker-ml/.gitlab-ci.yml'
    ref: 'main'
  - project: 'shared/deploy'
    file: 'deploy-dev/.gitlab-ci.yml'
    ref: 'main'
  - project: 'shared/deploy'
    file: 'deploy-prod/.gitlab-ci.yml'
    ref: 'main'

stages:
  - docker_lint
  - ansible_lint
  - build
  - deploy-dev
  - deploy-production

# The end =)
It’s important in this step that the stages: instructions should refer to existing stages in the shared/.../.gitlab-ci.yml files.
There are two approaches to how to deliver code with such includes to the main pipeline. The ref: instruction is responsible for this:
1) ref: 'main' - all changes must get into main, after which all main pipelines will receive them when they start
2) ref: 'feature-name' - you can granularly deliver changes, going through all the main pipelines and moving to a new version.
Both approaches have strengths and weaknesses, for example, when using ref: 'main', you can instantly deliver build changes for all gitlab.example.com/develop/.gitlab-ci.yml, gitlab.example.com/develop1/.gitlab-ci.yml, gitlab.example.com/develop2/.gitlab-ci.yml and so on, and what if you have more than a hundred of them? This is convenient. But the risk of delivering an error to all repos at once increases.
When using ref: 'feature-name', you can more strictly monitor errors and test, for example, only on gitlab.example.com/develop/.gitlab-ci.yml without delivering code changes to the rest gitlab.example.com/develop1/.gitlab-ci.yml, … But this will be slower.
As always, the choice is yours =)